How to fix bracelet
If your bracelet breaks, it's not necessarily a bad thing. It protected you well and served its purpose. The break itself actually signifies that something bad has come to an end, so maybe it should even be celebrated! However, it will probably make you sad; you can't wear it anymore if it's broken. Don't worry! We care about our customers and now provide an additional cord. If you have to make it again, then cleanse your stones first and you can rest assured that it will have fresh energy.
How to use your repair kit:
You will also need:
- Scissors
- Tape or binder clip
- Super glue
Step 1:
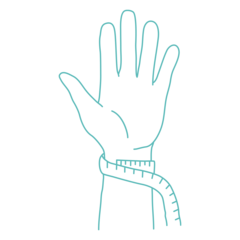
Measure your wrist and cut the elastic a little bit longer. Take the beading elastic and wrap it one and a half times around your wrist. Cut it with a pair of sharp scissors. You are making it slightly larger so that you can knot it later.
Fitting Style:
In order to choose the perfect fit for you, add inch(es) / cm to your wrist size according to the instructions below:
-
Snug Fit
Add 1/4" to 1/2" (0.6 cm to 1.2 cm)
-
Comfort Fit
Add 3/4" to 1" (1.9 cm to 2.5 cm)
-
Loose Fit
Add 1 1/4" (3.1 cm)
Step 2:

Stretch your cord before stringing any beads. Hold the elastic between your fingers and stretch it gently. Your bracelet will stay the right size and won't stretch out leaving gaps between the beads.
Step 3:

Fold some tape over one of the ends of the elastic. This will prevent the beads from sliding off while you work. If you do not have any tape, or if the tape won't stick, use a binder clip instead.
Step 4:

Put the beads onto the elastic. Hold the elastic close to the end, and slip the beads on. Once you finish the bracelet, you can hide the knot by sliding it under that bead.
Step 5:

Keep adding beads until you have the length you want. Be sure to wrap the bracelet round your wrist from time to time. The first and last bead should be touching, and the bracelet should be somewhat loose. If you see any gaps or cord, you will need more beads.
Step 6:

Take the tape or clip off, and tie a square/surgeon knot. Start by folding the two ends of the elastic over and under each other, like tying a pair of shoes.
Step 7:

Try to slide the knot under one of the beads. If you can slide the knot under one of the beads, trim off the extra string and put a drop of glue over the knot. Slide the knot under the bead. If you can't fit the knot under one of the beads, tuck the tail ends inside the beads instead. Put a drop of glue on top of the knot to seal it.
Step 8:

Wait for the glue to dry before wearing your bracelet. If you try to put the bracelet on too soon, the knot may loosen and the glue may crack. Most glues will dry in about 15 minutes.
More tips for bracelet to last:
- Always put your elastic bracelet on the right way. This is one of the main factors in bracelets that don't last. Never put on your bracelet by stretching it over your hand. As much as possible, roll it over your hand without excessive pulling.
- Keep the bracelet away from soap, perfumes, hair and skin products, sunscreen, salt water, etc. Many of the products we use every day can degrade the quality of the elastic over time.